Finishing Touches | the hall
Welcome to the dungeon, cave...fine...hall.
As I went back a few months to find before photos, I was actually shocked at what the hallway looked like when we bought the place!
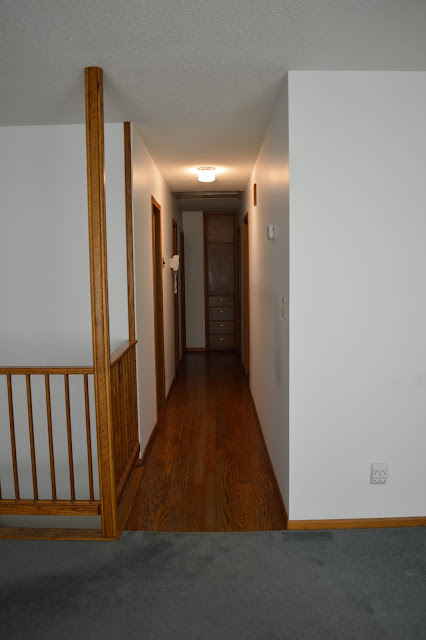


As I went back a few months to find before photos, I was actually shocked at what the hallway looked like when we bought the place!

When hubby explained that we would need to renovate the hallway before we could renovate our middle daughter's bedroom, which is across the hall from our son's already renovated room, I was a little disappointed. So was Miss Daughter. Seriously, what fun is a hallway? But, since we're doing our own flooring at our own pace, it was necessary to flow out of the shark room, into the hall, AND THEN into our daughter's room.
Sigh.
But nonetheless, we got to work.
And everything took longer than anticipated.
The laminate flooring was a beast to take out. The trim ended up being two different styles, so instead of keeping it, we decided to take the plunge and upgrade it, too...by DIYing it of course 😜. The popcorn ceiling scraped easily, but needed patched in places. AND, we installed a second light.
Doing that work plus painting the walls plus painting miles of trim and cabinets ended up taking us from the beginning of June until the end of July. (But the process inspired my first in a series of Home Connection posts...glass half full people! Read it HERE.)
The end-result makes me giddy.

What an impact! Insert lots of heart-eye emojis!
We still have things to do (of course), namely putting the last baseboard on {but that can't happen until we do the living room floors, so the corner can be properly fitted together}...painting all the doors...and hanging artwork on the wall. {I have a plan! Be sure to follow my writing page on Facebook for future updates!}
The floors are a continuation of our DIY hardwoods made from maple plywood that we used in our son's room. I can't even describe how smooth they are under bare feet! I have an aversion to touching wooden handles (ie wooden spoons for cooking, wooden paintbrushes for painting) and I also can't stand the feeling of "dry" wood under my feet (which is why I promptly put a rug on our back deck)...so for me to say I LIKE walking on this floor is pretty huuuugggge.

As I worked on the built-in cabinets, I fully intended to put the doors back on. But after I lined the back with contact paper, I decided to leave it open. The globe is a must-stay...the rest of the decor might get shifted. What can I say? I am always experimenting with things until I get the look I want!

The trim is another DIY project. Hubby and I came up with a plan for farmhouse-style trim. Then he cut it all and I painted. And painted. And painted. And then he painted. And painted. And the we painted. And painted. {Seriously...trim seems to multiply while painting}

I'm so thrilled by how this turned out. It was worth the wait! And now, we can move onto the bedroom. Here's a sneak peek (and it gives you a look at what the raw flooring looks like before we coat it with poly).

Before you go, take one last look at a before & after. You might get heart eyes, too!

See you soon! ❤


Beautiful work! Enjoy the fruits of your labor!
ReplyDeleteThank you! Will do!
DeleteLooks awesome! What is the color on the walls? It's gorgeous!
ReplyDeleteThank you! It is Streetwise by Behr...they have great blue tones!
DeleteHaving just finished prepping and painting our bedroom, living room, and entryway I am feeling your pain! But, oh, how the results are worth it!
ReplyDeleteOh, fun! Yes, definitely worth the work! We have a LONG road ahead, but it will be wonderful once completed!
DeleteIt's actually Calm bu Behr...we used streetwise in our last house...whoops!
Delete